
Higher Logic Blog
3 min read
Tags: Member Engagement, Professional Associations, Trade Associations
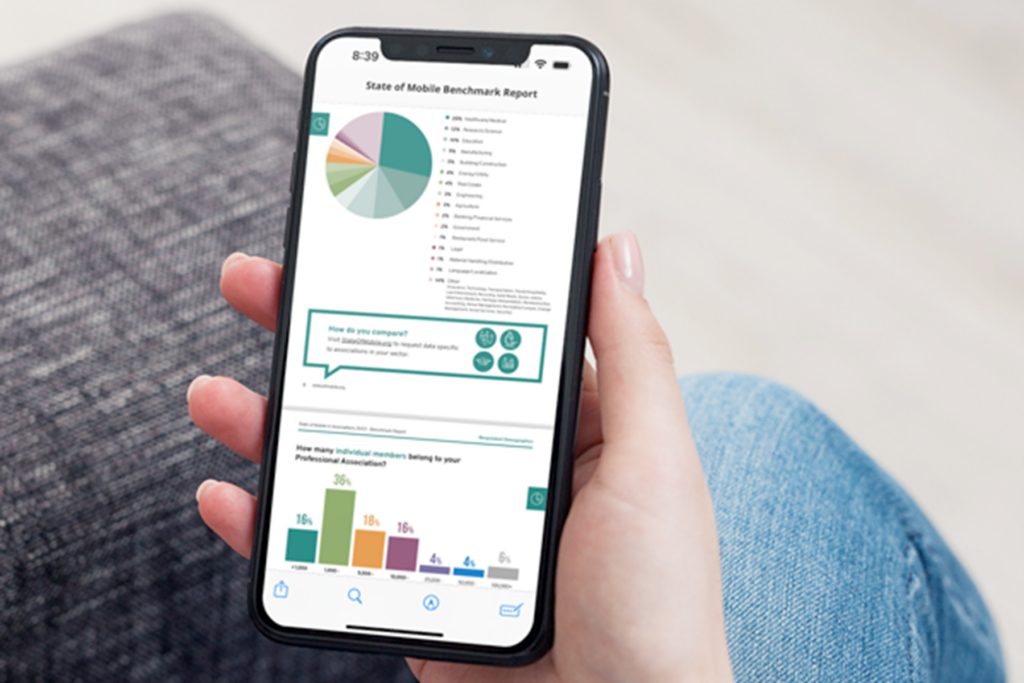
Mobile Apps in Associations: Highlights from the State of Mobile Benchmark Report
Mobile apps are now widely used by 82% associations to support conferences and events. Learn more in the State of Mobile Benchmark Report.


5 min read
Tags: Member Acquisition, Member Engagement
Association Job Boards Power Engagement, Member Value, and Revenue
Your members want to advance their careers, and your association job board can become an essential tool in helping them do just that.


8 min read
Tags: Association Strategy, Marketing and Communications, Member Engagement
What is Email Deliverability, Why Does it Matter, and How Can You Improve Yours?
Your email deliverability rate is more important than you might think. Your emails can't engage members if they never reach the inbox! Let's walk through how to improve yours!


2 min read
Tags: Association Strategy, Community Strategy, Marketing and Communications, Member Engagement
Using Automation to Run Your Association More Efficiently
Your association can’t run on magic, but automation can sometimes seem like it. Learn how it can help you improve the efficiency of your member engagement, community, and marketing efforts.

6 min read
Tags: Community Strategy, Professional Associations, Trade Associations
The Impact of Federated Search for Associations
Federated search makes your website experience better, ensuring your members don't get frustrated and look for industry resources elsewhere.


5 min read
Tags: HL Product Updates, Member Engagement
Digital Transformation Can Start Small and Have Exponential Impacts
In today’s landscape, it's so important to streamline staff workflows and deliver easy member experiences online. Learn how you can facilitate digital transformation.

6 min read
Tags: Community Strategy, Member Engagement
Gamification for Your Online Community: Fun Ways to Engage Members
As an association professional or community manager, gamification can help you bolster member engagement within your online community.


4 min read
Tags: Association Strategy, Member Engagement
The Biggest Change in Member Engagement Since Marketing Automation
Personalization has become a key component in how we communicate with members. Learn how you can use data, AI and automation to improve member engagement.


6 min read
Tags: Community Strategy
Distinguishing Your Online Community Personas
Community personas help you understand your community members, and come up with ways to engage and support them. Learn how to plan yours!


Higher Logic Thrive is purpose-built for associations.
With three core packages to choose from, and multiple add-on services to enhance your member experience, create the member engagement solution that works for you!